Designer · Maker · Problem solver

Useful things,
made well.

I’m Mike, an Adelaide-based designer turning everyday problems into considered digital and physical objects.

Explore
149Unique visitors
22Page views · 24 hours
25Published designs
12Free downloads
13Premium designs
177Cults3D downloads

What I do

From an idea on paper to an object in your hand.

I design practical objects for 3D printing, prototype quickly, and refine the small details that make something satisfying to use.

Selected work

A few recent things

See all work
Diamond Painting Carousel Drill Organizer and Dispenser € 9.90

Art

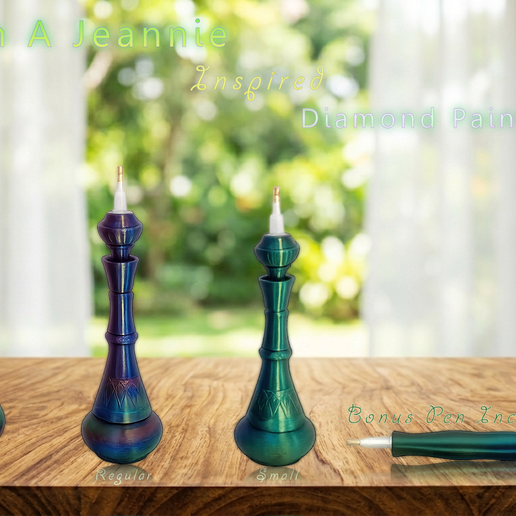
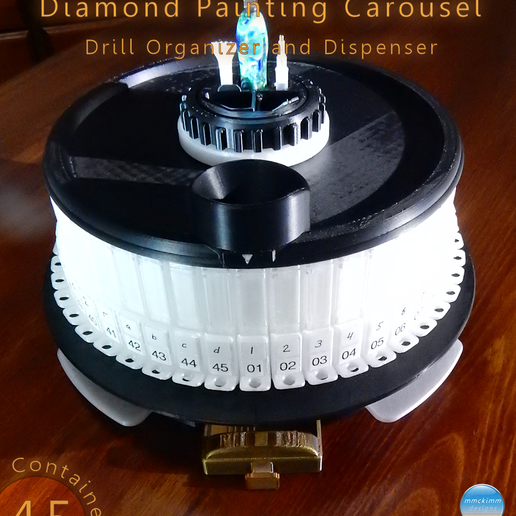
Diamond Painting Carousel Drill Organizer and Dispenser

The Ultimate 45-Container Carousel Drill Organizer & Dispenser!

Ready to turn your craft station into a high-efficiency workspace? Stop opening, closing, and knocking over endless small storage jars. This mechanical, rotating Carousel Drill Organizer & Dispenser is the ultimate luxury upgrade for serious diamond painters.

Store up to 45 individual drill colors in one incredibly compact desk footprint. When you need a color, just spin the carousel into position, pull the built-in slide gate to dispense the perfect amount of drills into your tray, and push it closed. No pouring, no shaking, and zero accidental static spills.

✨ Engineering Features Built For Crafters: Mechanical Slide-Out Gates: Individual braced container holders slide out exactly 10mm to cleanly dispense drills down into your tray, closing securely when pushed back in.

High-Capacity Modular Containers: Features 45 custom-fit containers designed to hold ~800 drills each. Built from a 2-piece snapping design, they make cleaning and color swapping completely effortless.

All-In-One Command Center: The top center column features 3 built-in pen holders (up to 20mm wide), a dedicated mini-tray for interchangeable pen tips, and a removable waste container for trash drills.

Integrated Chart Clips: Includes optional straight and tilted top panels so you can clip your canvas symbol charts directly onto the carousel at eye level!

BONUS Lidded Drill Tray Included: This complete package includes a matching 15mm-wall lidded drill tray with a bonus dish. (The carousel clearance fits trays up to 75mm wide and 20mm tall).

Small Bed Friendly: Don't have a massive printer? No problem! Cleverly designed as fully interlocking, modulated pieces that print beautifully on standard 220mm x 220mm plates (Ender 3, Bambu A1/P1/X1 series, etc.) to be glued together.

Large Bed Option Included: If you have a 300mm x 300mm or larger bed, a pre-joined, solid-piece base plate file is included for an even faster print job.

What's in the Box: Full high-quality STL files, complete assembly blueprints, and optimized printing instructions in a neat .zip file.

⚖️ Print Weight: ~2.8 KG (A heavy-duty, rock-solid desk showpiece)

📐 Dimensions: 167.65mm High x 300mm Wide
Diamond Painting Tumbler (60 Piece Cylindrical Jar Storage) € 7.43

Art

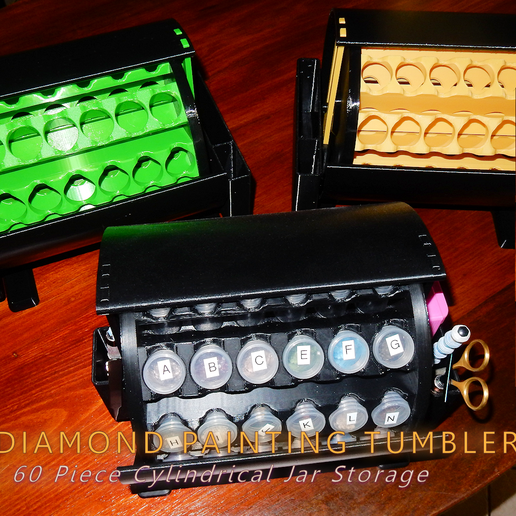
Diamond Painting Tumbler (60 Piece Cylindrical Jar Storage)

💎 The Ultimate Space-Saving 60-Jar Diamond Painting Tumbler!

Tired of a cluttered desk, mismatched storage bins, and constantly hunting for the right drill color? Bring elite organization to your craft space with this mechanical, smooth-rolling Cylindrical Jar Tumbler! Designed to maximize your workspace, it packs massive storage into a remarkably compact desk footprint.

Rotated around a central shaft, this desk-sized ferris wheel features 10 horizontal rows holding 6 jars each. Just spin, grab your color, and keep painting!

✨ Key Features You’ll Love: Massive 60-Bottle Capacity: Fits standard 50mm (2-inch, 10-12g) clear plastic diamond painting bottles (28mm diameter holes).

Smart Access Design: Features strategic frame recesses around the container lids, giving you a perfect grip for quick bottle removal.

All-In-One Side Storage: Swapable/mountable side caddies specifically sized for your pens, trays, scissors, and tweezers.

🚀 NEW Upgraded Extended Trays Included: Now includes dual partitioned side-holders so you can keep your active trays completely separated from your tools.

Sturdy & Portable: Features a rock-solid, integrated handle frame. Need to clear the table? Just pick it up and move it in one piece.

Build Plate Friendly: Optimized to easily print on standard 250mm x 250mm beds (like the Bambu Lab Series, Creality K1 Max/K1C, etc.).

What's in the Download: Complete STL files, step-by-step assembly image guides, and optimal printing notes/instructions tucked inside a neat .zip file.

Kitchen Sink Caddy Organizer Free

Home

Kitchen Sink Caddy Organizer

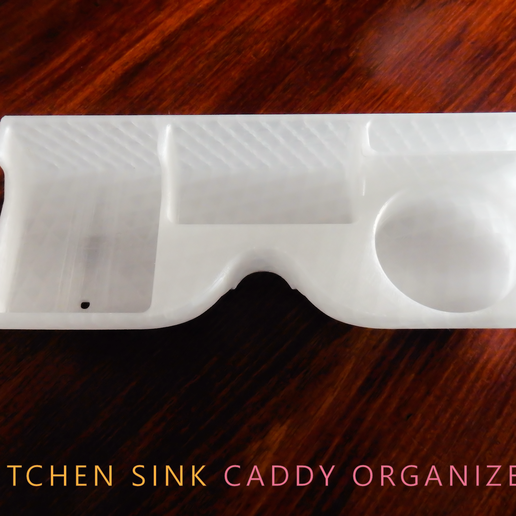
A Kitchen Sink Caddy Organizer to suit your standard mixer-tap double basin.

There are provisions as shown in the display and model images that allow for storing:

  • A sponge (sized to 100mm x 75mm or less)
  • Rectangular based Dish Washing Liquid Bottle (100mm length x 50mm wide)
  • Single Plug holder
  • Spare area spaced for a cup or bottle, etc, (75mm Diameter)

The sponge, liquid bottle and plug holder have drain cavities that are designed to flow from the front bottom surface into the sink basins.

To allow for printing on smaller build plates (220 x 220 x 220mm and larger), the model comes either divided into two separate left and right pieces that can be glued in the middle to form a solid piece, or if you have access to a printer with a build plate of 300 x 300 x 300mm or greater, then there is a solid one piece complete model file to use.

Dimensions for the model are: 110mm Wide, 280mm Length, and 55mm in Height.

Creality K1 Max Build Plate Edge Clamps Free

Tool

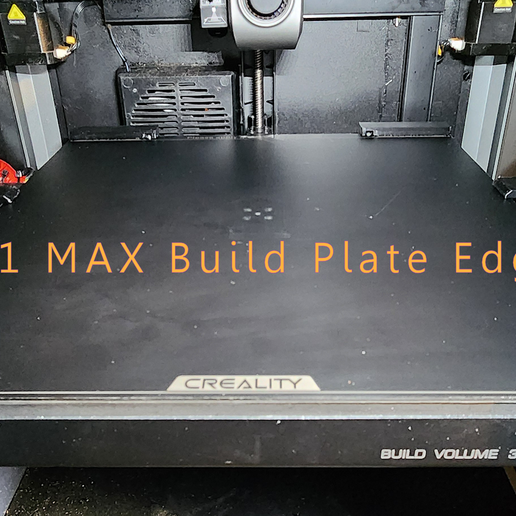
Creality K1 Max Build Plate Edge Clamps

The Ultimate Solution for Edge Warping & Preventing Magnetic Bed Lifting on High-Temperature Prints

Have you ever had a long, large-scale ABS or ASA print ruined because the edges of your flexible build plate lifted right off the magnetic sheet?

When printing massive models that consume most of your build volume, massive shrinking forces develop. In colder climates or unheated chambers, the filament contracts and pulls upward. Combine that strong bed adhesion with the fact that magnetic sheets lose their holding power at high temperatures (like 100°C), your build plate can become an annoyance to deal with. It warps, lifts, and ruins your print dimensional accuracy.

These Modular Build Plate Edge Clamps are engineered specifically to firmly lock your build plate down, completely eliminating bed-lift and ensuring perfectly flat prints every time.


Smart, Functional Engineering

  • Modular Compatibility: Designed with versatility in mind. This system includes configurations to perfectly fit both the stock 3mm heat bed and heavy-duty 8mm graphite or aluminum heat beds.
  • Engineered Clearances: Carefully designed to route cleanly around your bed's power cables and structured to clear the earth lead screw.
  • Hardware Alignment Integration: The rear clamp features a dedicated, built-in notch cutout to seamlessly allocate and align with the stock bolt head used for build plate registration.
  • Rock-Solid Interlocking Design: A 4-piece clever geometric sandwich architecture. The front and back clamps slide together using an integrated rail guide, while a bottom chassis clamp slots in from below the leadscrew-to-heatbed chassis mount. The entire assembly is locked into a rigid frame using a standard M5 bolt and wingnut.

Why Choose This Over Standard Individual Clips?

  • Chassis-Anchored Rigidity: Traditional individual clips only pinch the build plate to the magnetic sheet. This advanced system anchors the entire assembly directly to the heavy-duty leadscrew-to-heatbed chassis mount, utilizing the machine’s own frame to fight warping forces.
  • Zero Slippage, Zero Fiddling: Instead of scattering multiple tiny point-clips around your bed — which are a hassle to align and can slip — this design features an interlocking rail system that perfectly frames the bed edges on each side in a single, unyielding block.
  • Heavy-Duty M5 Hardware: While standard clips rely on individual M3 screws that has the potential to strip or flex under high load, this pro-system relies on rock-solid M5 bolts and wingnuts for quick, tool-free locking power you can actually trust on a 20-hour print.

📦 What’s Included in the Download?

  • Mirrored Modular Clamp Sets (Left & Right sides)
  • 3mm Stock Bed Profiles
  • 8mm Upgraded Bed Profiles

⚙️ Required Hardware

To fully assemble both sides, you will need:

  • 2 x M5 Bolts (35mm length)
  • 4 x M5 Washers (or only two required if two Fibre washers are used on top)
  • 2 x M5 Fibre Washers (Optional: Used for tool-free operation)
  • 2 x M5 Wingnuts (Chosen for quick, tool-free disassembly)
  • Glue (A small amount of strong bonding model glue)
  • High-heat resistant clear varnish (Optional: layered for a solid structural coating and protection)

💡 Tips before Mounting:

  1. Glue the back and front brace clamp model parts together to form one solid piece before using.
  2. Rather than using a standard metal M5 washer that sits underneath the bolt head and then tightens to the Top Slider Clamp part cavity, use a Fibre washer instead that allows for compressing when tightening down the wingnut for a tool-less operation.
  3. Glue a M5 metal washer to the underside of the bottom chassis clamp part where the bolt hole is situated to affix it in place, which saves you time and trouble when installing the bolt and wingnut.
  4. Make sure that the Ground cable where it attaches to the heat bed is positioned where it cannot interfere with the mounting procedures.

💡 Tips before Printing:

I would recommend you do a machine bed level calibration before starting your initial print after assembling or disassembling the build plate edge clamps.


Note: Display images may differ slightly from the actual model files if there are any future updates. The model images shown rendered in dark red are a correct representation of what comes with the design.

These models have been designed and scaled based from using the 8mm thick bed installed in my printer, so the clamps have been reduced down in height in order to facilitate the stock 3mm bed height. Most clearance issues for wiring and brackets have been accommodated for but if there are any issues you face with fitting to the stock 3mm bed plate then you can send my a message on this site and I will try to modify the part of the model to sort it out.

Disclaimer: I will not be held responsible for any damages or other interruptions that potentially could occur if you choose to use and mount this device to your 3D printer. Be cautious of what you are doing and use this device at your own risk.


Mounting Instructions

Note: Both sides assemble the same way. Proceed after following the gluing instructions outlined above in "Tips before Mounting". Also make sure that the heater is secured to the heat bed around the regions where the clamps are binding.

  1. Inserting from below the build plate chassis, you need to position the glued (joined) together "front/back clamp" part so that it will slot around and bind the built plate to the heatbed plate, while at the same time having the front lip rest upon the leadscrew-to-heatbed chassis mount (as shown in the "display 4" photo image). Make sure that the clamp that is half way along this part is sitting on the build plate surface.
  2. Position the top slider clamp part in front of the extruded tab handle on the build plate, and slide forward over the heatbed and build plate where the tab can pass through the gap on the model part, so this will end up clamping these plates together. This top slider part has a channel that aligns and is guided by the riser section on the "front/back clamp".
  3. The bottom chassis clamp has a notch that is inserted into the "front/back clamp" part when it is pushed up from below the 3D printers leadscrew-to-heatbed chassis mount. This should help align this part to the frame when inserting the bolt from above, clamping all three parts together and securing them tightly with a Wingnut at the bottom. (See display images 2 and 3 for side on and bottom views of the parts assembled on the work bench.)

Print something useful

My downloadable 3D models live on Cults3D.

Visit my Cults3D profile